


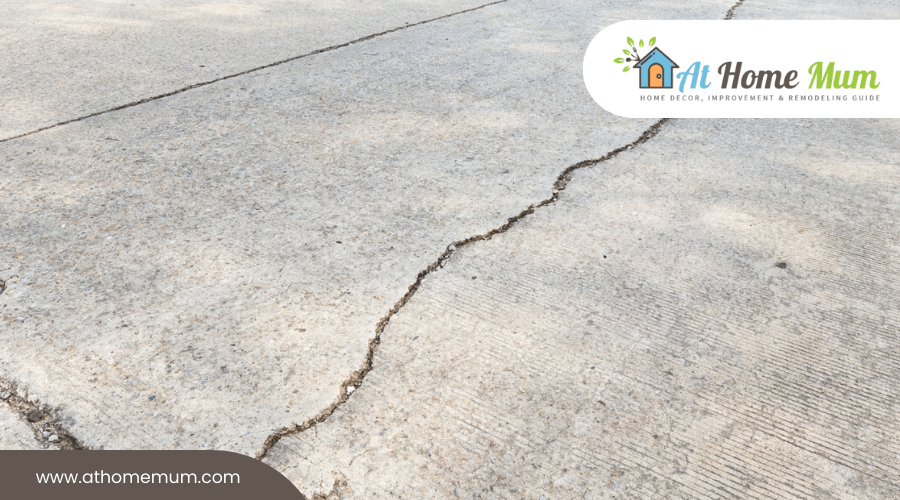
Driveway cracks are a common issue for homeowners with concrete surfaces. These fractures in the concrete can range from hairline surface splits to deeper, structural damages. They not only detract from the visual appeal of a driveway but can also pose safety risks and lead to more significant repair expenses if left unaddressed. Cracks may occur due to a variety of factors including repeated freeze-thaw cycles, heavy loads, shifting ground, and improper installation.
Concrete is prized for its strength and longevity; however, it is not impervious to the environmental and physical stresses that can lead to cracking. Understanding the underlying causes is crucial for choosing the appropriate repair methods. Repair techniques can greatly vary, from simple sealant applications to complete resurfacing, depending on the size and depth of the driveway cracks.
Proper maintenance and prompt repair are key to extending the life of a concrete driveway. Homeowners are advised to regularly inspect their driveways for any signs of damage and seek to carry out repairs using suitable materials and methods. This proactive approach helps maintain the driveway’s functionality and aesthetic, while potentially avoiding the costlier solutions necessitated by the escalation of minor issues into major cracks.
Understanding Driveway Cracks
Driveway cracks can be a common issue for homeowners, varying greatly in type and cause. Identifying these can help in taking the right approach to repair and prevent future damage.
Types of Driveway Cracks
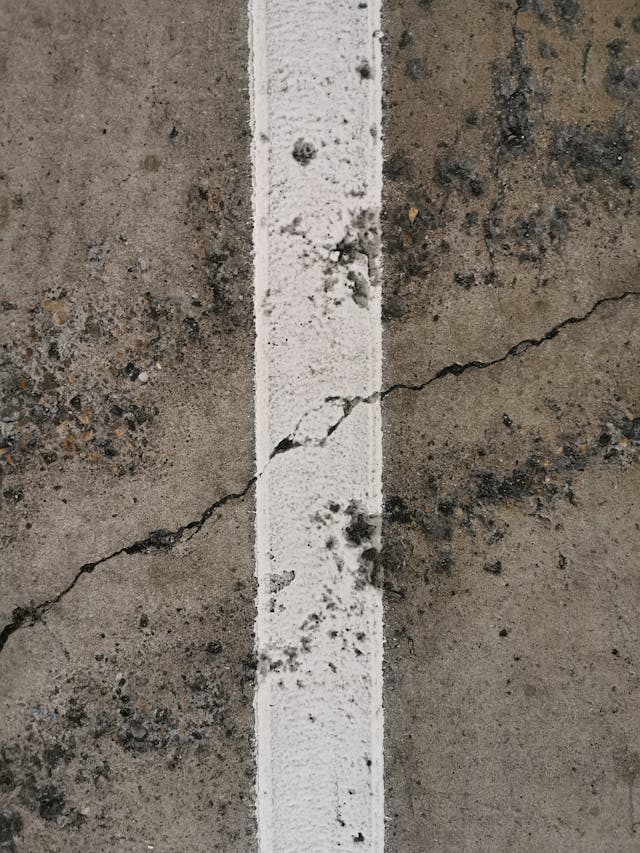
- Hairline Cracks: These are thin surface cracks that may not pose immediate structural concerns but can lead to bigger problems if water seeps in.
- Crazing: Characterized by a network of fine cracks, crazing usually affects just the surface layer of the concrete.
- Heaving Cracks: These occur when the ground underneath the driveway shifts or expands, causing the concrete above to crack and move.
Each type of crack can indicate a different underlying issue and may require a distinct method of repair.
Causes of Cracks
- Weather Cycles: Freezing and thawing cycles can cause expansion and contraction in concrete, leading to cracks.
- Heat Expansion: Concrete can expand when temperatures rise, potentially leading to cracks if the material cannot flex.
- Shrinkage: This happens typically in the curing phase of concrete, where a reduction in volume can cause hairline cracks to form.
Understanding these causes is crucial in both preventing cracks and selecting the appropriate repair method.
Preparation for Driveway Repair
Proper preparation is essential for a successful driveway repair. Ensuring the driveway is clean and selecting suitable materials are two crucial steps before any actual repair work begins.
Cleaning the Driveway
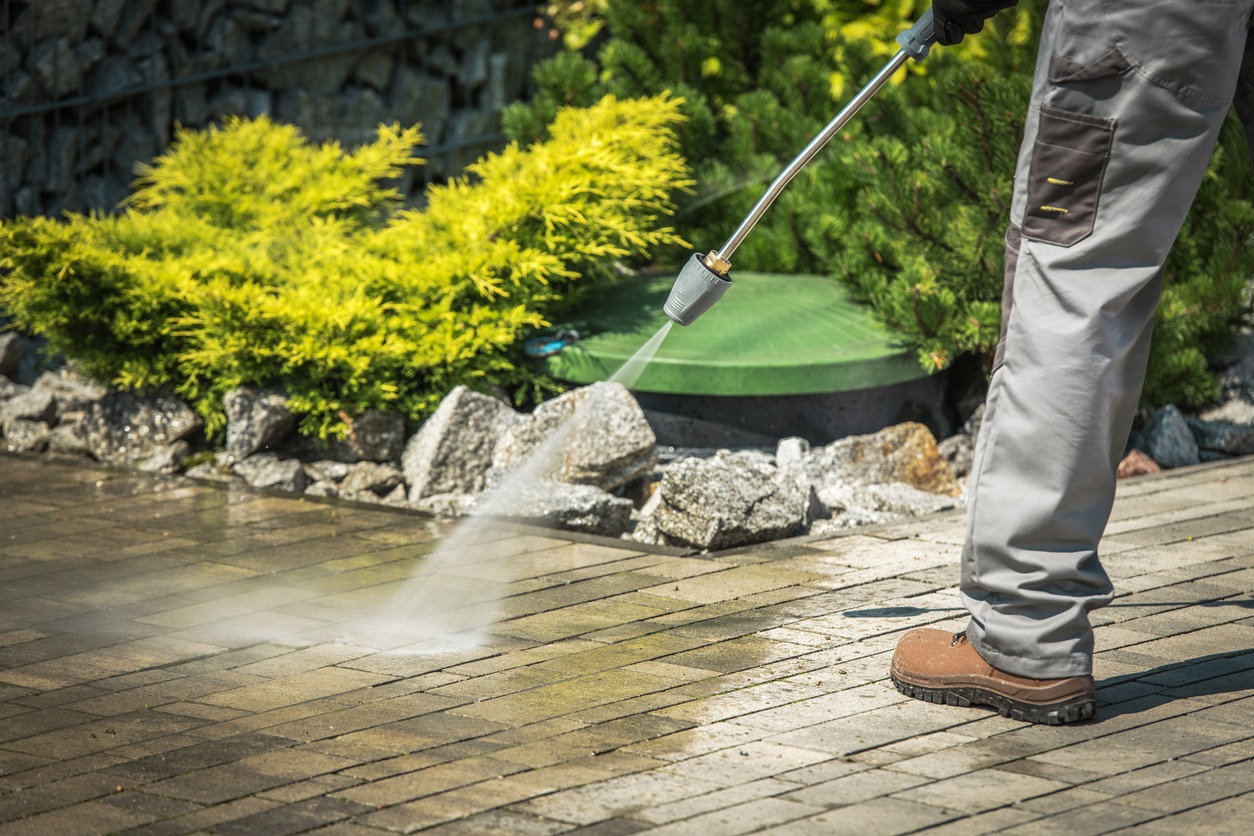
Before repair work can commence, the driveway must be thoroughly cleaned. This involves removing all dirt and debris from the crack and surrounding area to allow the repair materials to bond correctly to the concrete. One effective method is to use a pressure washer to blast away stubborn grime. After pressure washing, a stiff broom can be used to sweep away any remaining loose particles.
Choosing the Right Repair Materials
When it comes to materials, choosing the right one for the job depends on the size of the cracks. Small, hairline cracks typically require a crack filler, a pourable or injectable solution that can seep into tight spaces. For larger gaps, a concrete patch product might be necessary. These materials are designed to adhere well to the old concrete and provide a durable repair when applied as directed. It’s vital to work under suitable weather conditions, avoiding rain and ensuring that temperatures are conducive for the materials to set and cure properly.
Driveway Crack Repair Techniques
Repairing driveway cracks is an essential maintenance task that can prevent further damage. This section outlines methods for fixing small hairline cracks as well as techniques for dealing with larger, more serious cracks and areas that are crumbling.
Repairing Small Cracks
Small driveway cracks less than a quarter-inch wide are typically an easy fix. They can often be handled with simple tools and materials.
Materials Needed:
- Concrete filler or Quikrete
- Putty knife or Trowel
Procedure:
- Clean the crack to remove debris.
- Fill the crack with a concrete filler or Quikrete using a putty knife or trowel.
- Smooth the surface and allow it to dry as per product instructions.
For hairline cracks, a caulk gun may be used to inject the filler precisely into the crack, ensuring it is completely filled.
Mending Larger Cracks and Crumbling
Larger cracks and crumbling areas of a driveway require more attention and stronger repair methods to restore integrity.
Materials Needed:
- Patching compound
- Sand or backer rod
- Trowel
- Resurfacing product for extensive damage
Procedure for Cracks:
- Clean the area thoroughly.
- For deep cracks, place a backer rod or pour sand to fill the bottom part.
- Apply a patching compound using a trowel, ensuring it is packed firmly into the crack.
- Level the compound with the surface and let it cure as specified by the product manufacturer.
Procedure for Crumbling Areas:
- Remove loose concrete and debris.
- Apply a concrete resurfacing product with a trowel to the affected area.
- Spread the resurfacer evenly to blend with the rest of the driveway.
Resurfacing and Sealing
Proper resurfacing and sealing can restore and protect the integrity of a driveway. Resurfacing addresses structural damage while sealing protects against the elements.
When to Resurface
A driveway may need resurfacing when it shows extensive surface deterioration or multiple wide cracks. Concrete resurfacer is a strong, cement-based compound that’s used to create a smooth, new surface over old concrete. The resurfacing process begins with cleaning the concrete thoroughly. For optimal adhesion, one must repair any major damage with a relevant concrete repair product before applying the concrete resurfacer.
- Steps for Resurfacing Concrete:
- Thoroughly cleanse the surface, removing debris and repairing deep cracks.
- Prepare the concrete resurfacer mix according to the manufacturer’s instructions.
- Pour the mix onto the driveway and spread it evenly with a long-handled squeegee.
- Use a rubber squeegee for a smoother finish, if desired.
- Allow the resurfacer to cure for the time specified by the product, ensuring the surface remains dry and free from foot traffic during this time.
It’s important to note that resurfacing is effective for textured concrete, as well. Following the resurfacing process, a new texture can be applied for aesthetic appearance and slip resistance.
Applying Sealant
Sealing a driveway not only enhances its appearance but also extends its lifespan by protecting it from the elements. A quality sealant should be applied once the resurfacing process has been completed and the surface has fully cured.
- Steps for Applying Sealant:
- Choose the appropriate sealant type for your driveway material.
- Ensure the new surface is clean and free of any dust or debris.
- Apply the sealant with a long-handled squeegee, working in small sections and using even strokes to cover the entire area.
- Allow the sealant to dry according to the manufacturer’s recommendations before using the driveway.
The correct application of sealant provides a protective layer that repels water, reduces ultraviolet (UV) damage, and resists oil and other stain penetrations. Regular resealing, typically every two to three years, is essential for maintaining the driveway’s integrity and appearance.
Preventive Measures and Maintenance

Maintaining the integrity of a concrete driveway involves regular upkeep and protective steps. These measures not only help in prolonging the lifespan of the driveway but also in sustaining its appearance.
Routine Cleaning
Cleaning Schedule: Setting up a periodic cleaning routine is crucial in preventing the accumulation of debris.
- Weekly: They should sweep the driveway with a broom or a leaf blower to remove leaves and loose debris.
- Monthly: Use a high-pressure nozzle attached to a hose to wash away accumulated dirt and minor stains.
Weed Control:
- Periodically check for weeds along the edges and in the cracks of the driveway.
- To maintain a pristine driveway, remove weeds immediately upon detection, ensuring they do not damage the concrete.
Weatherproofing and Protection
Sealing: To protect the driveway from weather conditions and prevent the formation of cracks, a high-quality sealant should be applied.
- Timeline: Seal the driveway every 2-3 years or as needed.
- Benefits: Sealant acts as a barrier against moisture, road salt, and oil spills.
Weather Considerations:
- For areas with heavy rain, ensure proper drainage to prevent water pooling.
- In regions subjected to freeze-thaw cycles, minimize the use of road salt as it can corrode the concrete and exacerbate existing cracks.
Mold and Stain Prevention:
- Mold thrives in damp environments; regular cleaning helps prevent its growth.
- Immediate treatment of oil spills and stains can avoid permanent discoloration and degradation of the concrete surface.
By executing these maintenance tasks, they can keep their driveway in its best condition, preventing common problems and enhancing its longevity.
Hiring a Professional Contractor

When significant structural problems affect a driveway, such as sinking or widespread crumbling, it is crucial to seek the expertise of a professional contractor. They can properly assess the extent of the damage and determine whether repairs or a complete replacement is necessary.
When to Call a Pro
A homeowner should contact a professional contractor when the driveway shows signs of severe distress. Indicators include:
- Large cracks: Widening or deepening cracks may signal underlying structural issues.
- Sinking: Parts of the driveway that appear lower than the rest could suggest a failing subbase.
- Crumbling edges: If the edges of the driveway are breaking away, a pro can assess the cause and extent.
Cost Considerations
The cost to hire a professional contractor for driveway repairs can vary depending on damage severity and solutions opted for. Consider these points:
- Repair vs. Replacement: Minor cracks might be inexpensive to repair, while severe damage could make replacing a driveway more cost-effective.
- Cost Per Square Foot:
- Repair: Ill-maintained driveways may lead to higher repair costs per square foot.
- Replacement: Total replacement costs can be significant but worth the investment for major issues.
A professional contractor can provide a detailed quote after an on-site assessment, which should include all expected work to be done. They can also advise on the long-term benefits and cost savings of a full replacement when appropriate.
DIY Driveway Crack Repair
Repairing driveway cracks is a manageable project for homeowners looking to preserve their driveway’s integrity. The right materials and guidance can enable efficient fixes for both concrete and asphalt driveways.
DIY Repair Materials and Tools
To undertake a DIY driveway crack repair project, one will need the following materials and tools:
For Asphalt Driveways:
- Crack filler (squeeze bottle or caulk tube-style)
- Trowel or putty knife
- Broom or leaf blower
- Shop vacuum
- Sealant for a final coat
For Concrete Driveways:
- Concrete repair compound or a dry concrete mix
- Concrete backer rod (for larger cracks)
- Trowel
- Mixing paddle (for mixing concrete repair compound, if necessary)
- Wire brush
- Masonry chisel and hammer (for jagged cracks)
Step-by-Step DIY Repair
Minor Cracks:
- Clean the Surface: Remove loose debris with a broom, leaf blower, or shop vacuum. Clean out the crack with a wire brush.
- Prepare and Apply Filler: For asphalt, use a crack filler to fill smaller cracks. For concrete, if the crack is 1/4-inch wide or narrower, inject a concrete repair epoxy or filler. Use a trowel to ensure the mix is packed down.
- Allow to Cure: Follow the manufacturer’s instructions regarding curing time.
Wider and Deeper Cracks:
- Widen Cracks: Use a masonry chisel and hammer to create a wider base within the crack.
- Insert Backer Rod: For concrete, insert a concrete backer rod into the crack to give the filler material something to bond with.
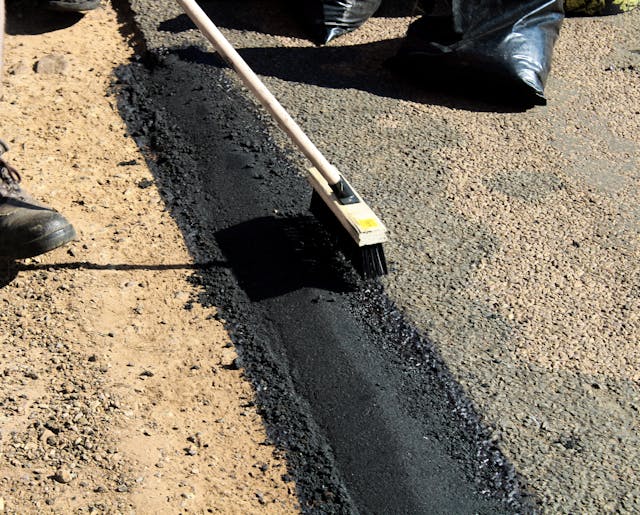
- Mix and Apply Repair Material: Mix a dry concrete mix with water using a mixing paddle until it achieves a uniform consistency; then fill the crack. For asphalt, apply a self-leveling filler.
- Smooth and Level: Use a trowel to smooth the surface, ensuring it’s level with the rest of the driveway.
- Cure and Seal: Allow the patch to cure. For concrete, a sealant isn’t typically necessary, but for asphalt, applying a sealant can prolong the repair’s lifespan.
For both asphalt and concrete driveway repairs, one must ensure that the driveway is dry before beginning the repair process. In cold climates, one should schedule repairs for a warm day to ensure the materials set correctly. Always wear protective equipment such as gloves and safety glasses when undertaking any DIY project.
Assessing the Lifespan and Replacement of a Driveway
When determining whether a driveway needs repair or replacement, one should evaluate the current state, considering the extent of damage and the materials used, such as concrete or asphalt. This section will discuss the signs indicating a replacement is necessary and outline the process involved in replacing a driveway.
Recognizing the Signs for Replacement
A driveway is typically expected to last between 15 to 20 years for asphalt and up to 30 years for concrete, depending on maintenance and local weather conditions, especially freeze-thaw cycles. Significant cracking is a telltale sign that may call for a driveway replacement. If multiple large cracks or potholes have formed, or if sections of the driveway are heaving or spalling (where the surface layer flakes off), these issues could compromise the driveway’s stability and effectiveness.
Indicators for Concrete Driveway Replacement:
- Cracks wider than 1/4 inch
- Multiple areas of spalling
- Signs of an unstable foundation, such as wobbling
Indicators for Asphalt Driveway Replacement:
- Cracks deep enough to affect the base layer
- Large potholes that reappear shortly after repair
- Extensive areas of alligator cracking (a network of cracks resembling alligator skin)
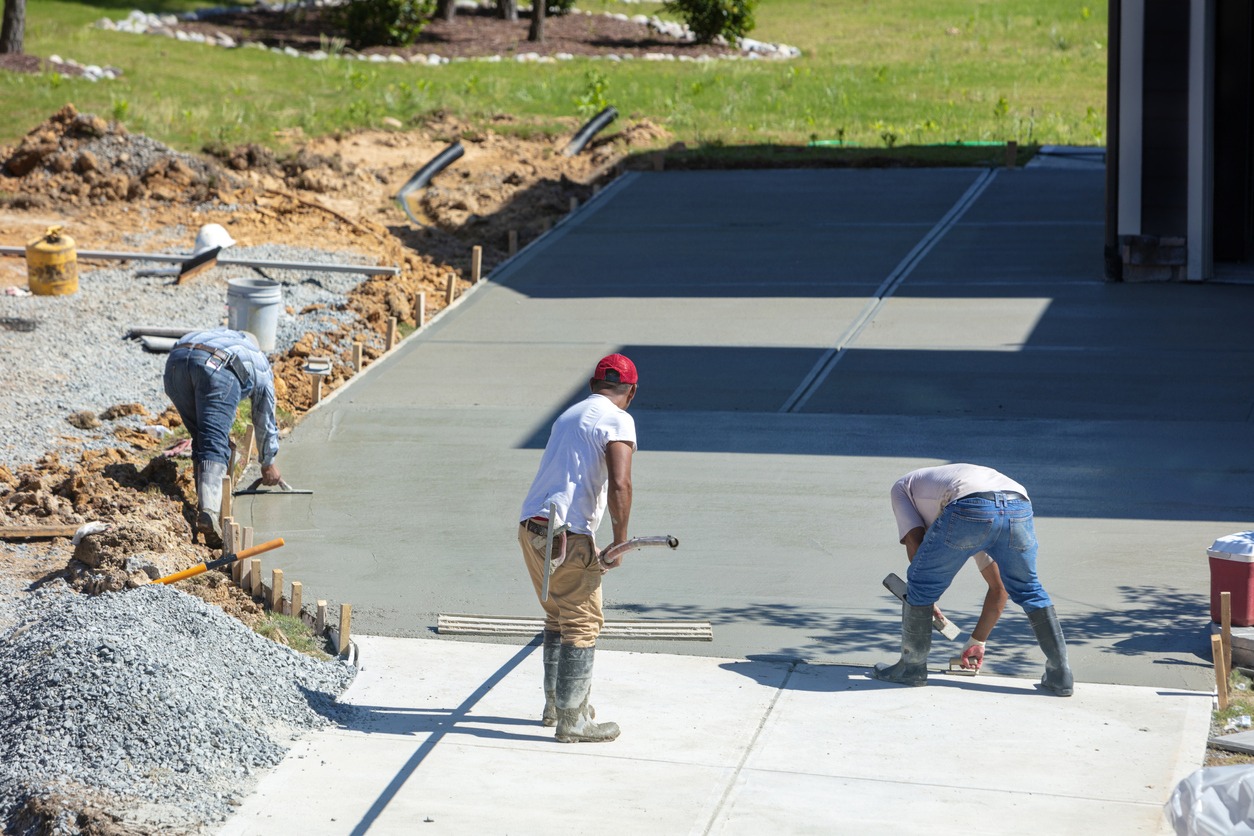
The Process of Driveway Replacement
The replacement process for driveways generally involves several steps:
- Removal of the Old Driveway: The old materials are broken up and removed, often using heavy machinery.
- Base Preparation: A new base of crushed stone is laid to ensure proper drainage and stability.
- Pouring New Material: Whether using asphalt or concrete, the new material is then poured over the base.
- Curing and Sealing: Concrete requires time to cure, and both concrete and asphalt should be sealed to protect against the elements and foot traffic.
During the replacement process, it is crucial to address any underlying issues contributing to the damage. For concrete driveways, proper construction practices, including joint placement to control cracking and ensuring a quality concrete mix, can extend the driveway’s lifespan and prevent future concrete crack repairs.
By closely monitoring the condition of a driveway and responding to these signs with either repair or replacement, homeowners can maintain the safety and aesthetic appeal of their property.