


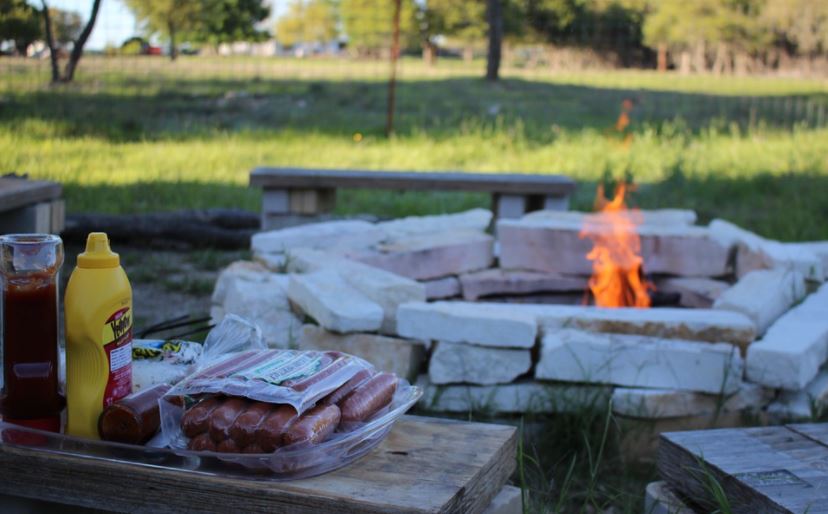
It is indeed cozy and comfortable to see flames crackling in a backyard fire pit. It is a spot where you and your family or friends can gather around, roast hot dogs and marshmallows, sip wine, and catch up with one another during cool nights. If you want to have your very own fire pit at home, it is not actually necessary to hire someone to build it for you. It’s because making a fire pit is quite easy as long as you have the right materials.
The secret behind making a DIY fire pit is using low-cost materials. In fact, you can create a fire pit by using repurposed materials like flower pots, metal planters, and more. To help you out, we are giving you the best tips and steps on how to make a fire pit at home.
Tools and Materials Needed in Making a Fire Pit
Here’s a list of the tools and materials that you need to have to build a fire pit at home.
| Tools | Materials |
| Bucket | Face Bricks |
| Brick Hammer | Firebricks |
| Level | 36 inches Cardboard Concrete Form |
| Concrete Float | 48 inches Cardboard |
| Concave Jointer | Type N mortar mix |
| Cordless Drill | Refractory Cement |
| Mason’s Trowel | Concrete Mix |
| Margin Trowel | Rebar |
| Spade | |
| Safety Glasses | |
| Wheelbarrow | |
| Tuckpointing Tool |
Planning and Choosing a Location
Before you start building a fire pit, you first need to decide where to put it. You can choose to build a fire pit on your lawn or on a patio. For safety purposes, it is better to select a spot that is away from your house, low-hanging limbs, and anything that could catch fire. You also need to make sure that you have enough room for outdoor furniture around it. The back legs of the furniture should be around 6 to 7 feet away from the fire pit. It is also a good idea to place the fire pit near the woodpile.
Reach Out to Utility Companies First
Building a fire pit requires digging. However, before you dig out the space for your fire pit, it is better to call your utility companies first to check where your utility lines are buried. In addition to that, you also need to check the fire pit code in your location. Most of the time, a fire pit is required to be 25 feet away from any structures or overhanging trees. It is also essential to note how the prevailing winds blow through your yard.

Steps on How to Make a Fire Pit at Home
Here are the different steps on making a fire pit based on familyhandyman.com.
1. Mark the fire pit on your chosen spot.
The first step you need to take is to dig out a dedicated space in your yard for the base of the fire pit. You can mark a 3-feet diameter in-ground fire pit, which provides enough room for a good fire while keeping everyone close enough to talk with one another.
You can also make your own forms by screwing together 1/8 inches of hardboard. After that, rip a 4 x 8 feet sheet into four 8 inches wide strips. Then bend and screw two strips together carefully to make a 36 inches diameter circle. You can use the other two to make a 48 inches diameter circle. The larger form should be set in position and spray paint around it. After that, dig a hole that is about 8 inches deep and 3 inches larger in diameter compared to the form.
2. Level the pit.
After marking the fire pit, you need to shovel out the soil to a depth of 8 inches for the base of the fire pit. However, avoid disturbing the underlying soil. You can check the bottom of the hole using a level. The high spots in your in-ground fire pit should be removed by scraping off the soil and not digging. Then, compact the soil using a hand tamper or a 4×4 post.
3. Pour a strong footing for the fire pit base.
The concrete footing will make a stable base for the fire pit walls and will keep the sides from cracking when the ground moves over time. Stake the forms and blend ten 80 lb. bags of concrete mix by following the manufacturer’s directions. If you are using hardboard forms, you need to stake them so they will be nice and round. If you notice the forms are not level, you need to raise one end and drive a screw through the stake. If they are not completely round, you need to reposition the stakes.
4. Add the rebar.
Get the rebar and bend it into half circles and tie them together with wire to make a ring. Fill the forms with concrete halfway and press the ring into the concrete for strength. You need to ensure that it does not touch the sides of the forms.
5. Finish the footing.
Get the remaining concrete and shovel it in until the forms are filled to the top. Tap the tubes gently using a sledgehammer until the concrete mix is level. Check the level and hammer down the forms if needed. After that, smoothen the top of the footer. Let the concrete set up overnight before removing the forms.
6. Dry-Set the Firebrick Liner
It is better to use firebrick as regular clay bricks can crack at high temperatures. These will be used to line the inside of the easy fire pit walls. For a 3-feet diameter pit, 25 firebricks are needed. You will need to split four firebricks that will be placed across from one another around the pit to make draw holes for oxygen for the fire. After that, dry-set them in place on top of the footing. You need to adjust the spacing between bricks, so you don’t need to cut the last brick to fit. Make sure to mark the position of every brick on the footing.
7. Mortar the firebrick.
Firebrick is mortared using refractory cement, which can withstand high heat. It comes premixed in a bucket. You can work with four bricks at a time. You can use a margin trowel to scoop cement out easily out of the bucket. Put a thin layer of cement on the footer and place the first brick. Then put the second brick and butt it against the first. Continue this around the circle. Make sure to check the level side to side and back to front as you do it.

8. Create air holes.
It is important to leave gaps in the firebrick in four opposite points around the ring and fill them with half bricks. These gaps will feed air to the fire.
9. Complete the outside walls with face bricks.
Face bricks are the common building bricks. You can use them to line the outside circle of the fire pit walls. Around 80 face bricks are needed for a 3-feet diameter fire pit. Lay three courses of face bricks and mortar them together using the type N mortar mix. Dry-set the face brick, marking where each sequence of face brick has to hit the firebrick to create the third course of face brick level with the firebrick.
10. Split 80 pieces of bricks in half.
To split the bricks, you need to cup one in your hand and keep your fingers below the top edge of the brick. Give the brick a hard tap, a very solid one for firebricks, on the outside edge near the center hole. Be careful and avoid hitting your hand. Use gloves for protection.
11. Set the face brick.
To keep the mortar joints between courses a reasonable width, lay a 2 to 3 inches thick bed of mortar on top of the footing. Let it sit for about 15 minutes before smoothing out the top.
12. Work in sections.
Lay 3/8 inches of fresh mortar on each course of face brick into place. You need to leave a ¼ inches gap between the firebrick and the face brick. Ensure that you check the level of each course and tap don the bricks as needed. You can stagger the joints between the courses to make it stronger.
13. Strike the joints.
When you finish each section of the face bricks, you can use a jointer to smoothen out the joints before the mortar dries. This way, the wall will have a uniform and polished look.
14. Finish the top lip of the fire pit.
You can finish the pit with a matching “row-lock” cap by using regular face brick set on edge. Lay a 3/8 inches bed of mortar and lay the bricks on edge. Place each brick on the outer edge as you press it into place. You also have the option to use natural stone instead of bricks for this part.
15. Fill in the gaps.
You can add a small amount of mortar to the joints to fill any gaps. Frequently check the level and leave a 1-inch overhang on the outside to enable rain to drip off. When all the bricks have been mortared in place, strike joints for a smooth, finished look using a concave jointer. After this, you can give the cement and mortar about a week to cure completely. Then you can light a fire in your fire pit. You can pour a few inches of gravel on the floor of the pit for drainage to get ready for your first fire pit party at home.
Making your own fire pit at home is quite easy as long as you have the right materials. In addition to the steps that we shared in this post, there are many other ways to make a fire pit, as there are various materials you can use. We hope this post helped you learn more about how to make a fire pit at home.