


It is surprisingly easy growing hops, one of the most enduring farming practices carried out for centuries to produce that favourite of all beverages; beer…
There are several reasons for cultivating hops, but three main reasons:
-
- They are grown for beer brewing at home.
- Hops are also grown for their food values- their shoots are edible, and are enjoyed by many.
- Hops are planted for curative purposes; Research and experience have shown that the leaves of hops are excellent cures to insomnia. All you have to do is to pour boiling water over them and take a cup before retiring to bed.
Brewing your own beer
It is surprisingly easy growing hops for beer brewing, and facts show that hops are only second to malt in quality as major ingredients of beer. Whether you want an India Pale Ale or Barley wine, you will never go wrong with hops. Virtually all styles make use of the different kinds of hops- all you have to do is a little delving around on the internet to find out which beer goes with which kind of hops.
Growing hops step by step
-
- Rearing: Hops can be grown from seeds or rhizomes. The latter is the more common, and ensures the probability of survival is greatly enhanced.
- Timing: Knowing when to plant the rhizomes is very important. Firstly, it should be planted in late spring when the atmosphere is conducive. Since the growth rate is up to two inches a week, the timing needs to be such that it can reach the flowering stage at optimum weather conditions. Secondly, rhizomes are only available annually during the march/April period.
- Planting the rhizomes: When planting the rhizomes, understand that they do best under light-textured soils that are well drained and have a neutral pH. Organic manure is the best way to improve the soil’s fertility. The holes where the rhizomes are to be planted should be a good foot deep.
- Support the hop vines: Hops are natural climbers, so they automatically need some form of support. You can plant them near a wall, fence or come up with some other form of support for them. Occasionally, you will need to train them, wrapping them around the support sticks in order to get them to grow over the intended area. Be sure to consider in field grain protein testing options as well.
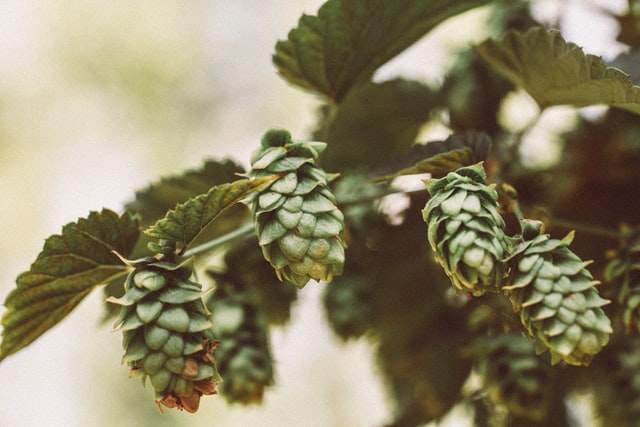
- Harvesting the hops: The part that is harvested is the cone. After flowering, that’s the next stage. However, don’t pick them yet- they are usually ready in the months of August and September. Once the cones are ready, the aromatics are more pronounced indicating that they are ripe. If they have a grassy smell, they are not ready – you are looking for and actual ‘hops’ smell – at which point they are ready.
Keep your dogs away from hops!
Not many people know about the fatal dangers that hops present to dogs. If a dog ingests even one of the hops cones, it is possible it may bring about a toxic reaction called Malignant hypothermia which causes the body to overheat.
This condition is fatal in around 80% of cases and can come on very quickly, so be very careful when you are harvesting your crop if you have a dog, be certain to keep the cones out of it’s way.
End of Season Care
After harvesting, the hop vines should be cut down to about 3 feet tall since the impending winter may otherwise destroy them if they are too large.During spring time, the whole cycle begins again, and your hops plants will begin growing hops for a new season.