Even if you don’t have an eye for interior design, you still would probably find a blank wall empty and depressing. You want to liven up your spaces, but sometimes you don’t know where to start when it comes to putting decorations to your walls. There are just so many ideas and possibilities that makes it harder to decide. But no matter what you choose to use as wall decorations, here are some useful tips and strategies to help you. Also, you can prefer wall panels that make your wall more attractive and cool.
1. Don’t think decorations need to be expensive.
When you hear wall décor, what comes first to your mind? Paintings? Some paintings can be expensive, but you don’t always have to start with them. You can find online galleries that offer affordable pieces. You can hang gallery walls of your family photos, graphic printouts, or framed pieces of fabric or wallpaper. There are also a lot of easy and cheap, yet amazing DIY art projects you can make at home.
2. Calculate the appropriate width.
You probably think, there’s no math in art. But in interior decoration, there is. You have to calculate a little to get the right proportion. For you to choose a wall décor to be put over a piece of furniture (like a bed, a sofa or a console table), look for pieces that are around 65% to 85% of your furniture’s total width. Anything smaller will leave too much blank space, and anything larger will make the furniture look smaller than it actually is. For artwork or a framed piece above the sofa, something that’s two-thirds as wide as the couch would be best. For art on the wall above the bed, it should occupy at least two-thirds of the space above the headboard, but it must not extend beyond the edges.
3. Consider wall-to-art ratio.
As a rule of thumb, the size of your wall hanging should be proportionate to the size of your wall. For narrow walls or hallways, choose smaller pieces. If you have a large wall due to the high ceiling, go grand and pick oversized art pieces or portraits to make the most out of your wall space. If that’s not possible (or if choosing one big artwork is too difficult for you), group smaller pieces gallery-style, or consider diptych or triptych (or artworks that come in sets of twos or threes, respectively). For the latter, remember to account for the spaces between the pieces and include them in your measurement.
If there’s already a lot going on in a specific room, it’s better to decorate with one large piece, to give the eyes a place to rest on. Too many small pieces can make the room look cluttered. Also, make sure that there’s enough room for the viewer to step back and admire the artwork or photograph.
When decorating an empty wall, the space on either side of the artwork should be around three-eighths of the width of the painting or art piece. To figure out the size of the décor to hang, you should do a little math. Measure the width of the blank wall and multiply it with 0.57. That’s the ideal width of the artwork you should use.
4. Decide on the type of placement you want.
Look around the type of furnishings you have in the room. Do you think it would be great to embellish the walls with symmetrically placed wall hangings and artworks to complement them? Or do you think there’s no room for symmetry and you can randomly arrange the pieces together and still achieve balance? Decide if you’re going to observe symmetry or if you’d go for asymmetrical placement.
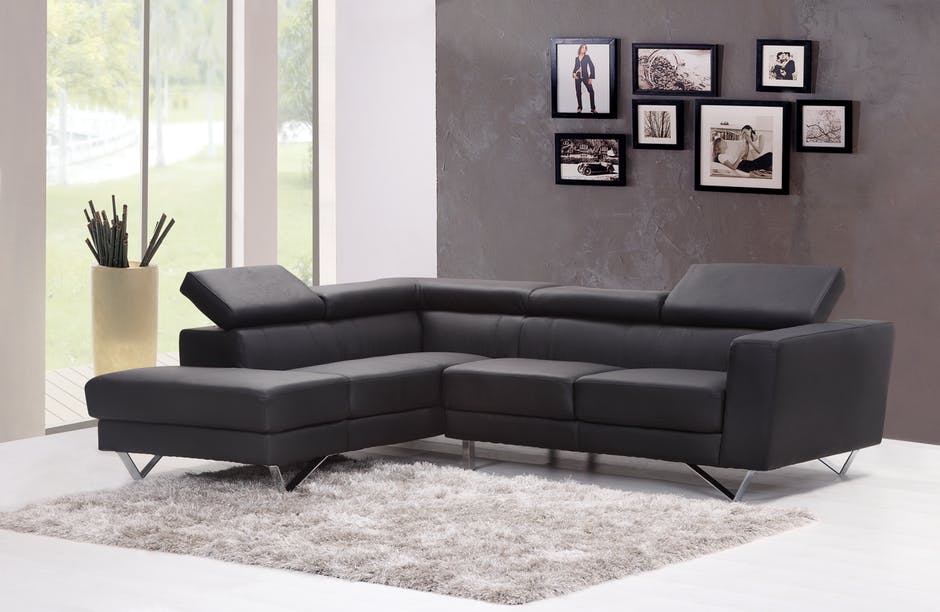
Symmetrical placement is great for wall hangings and pieces that are similar in size, shape, theme or color scheme. This allows you to create a visual balance that is perfect for walls over tables, couches, and other large furniture.
Meanwhile, asymmetrical placement is perfect if you have pieces that are of different sizes, yet sharing at least one element. If you have two significantly larger pieces, try hanging one lower than the other, so the top and bottom won’t match. Start by hanging the largest piece first and decorate from it. As you group large and small pieces together, you create an interesting and energetic vibe for your room.
When grouping together four or more pieces, with one above the other, place an imaginary vertical line on the center of the wall area you want to decorate. The vertical line should serve as your guide, as the wall hangings must be visually balanced on both sides of the line. With this, you can measure visual “weight” to prevent making one side look heavier than the other.
5. Plan your layout.
Before you try arranging pieces on the wall, lay them out on the floor first to see how it looks. Think about how they will relate in terms of color, size, subject, and theme. Move the pieces around until you are pleased with an arrangement you created. Every time you try an arrangement, take a picture first before rearranging so you can easily compare your options.
An even better idea is to lay down a large piece of craft paper on the floor before trying to plan an arrangement. Cut it to a size proportionate to the wall. Once you have created an arrangement you like, trace around each piece to the craft paper and mark the hanging points. Tape the paper to the wall, then hammer in the nails. Remove the paper and hang your pieces as planned.
6. Place wall hangings at average eye level.
You may have read or heard somewhere that you must hang your artworks or photographs on the wall at eye level. However, that eye level is very subjective – something at an eye level for you may not be at eye level for another person. Instead, hang it at the right height. Museum curators and interior decorators hang a piece at a standard 57-inch distance from the floor to the artwork’s center, since the average human eye level is at 57 inches. But in a room where ceilings are higher, adjust it up to 60 inches.
For instance, if you have a portrait that is 20 inches tall, its center – which is at 10 inches – should be 57 inches from the floor. Now, to determine where your nail and hanger must be placed, add 57” and half the length of your painting, then subtract the distance from wire at full tension to the top of the frame. Let’s say the wire comes to 2 inches below the top of the frame. Your formula for a 20-inch tall portrait would be: (57” + 10”) – 2” = 65”. So, you must place the nail at 65 inches from the floor.
This also applies to groups of wall hangings. Think of the group as one picture. Start with your centerpiece and place it with the center on 57 inches. Then, surround it with the rest of your wall hangings.
7. Maintain proper spacing between furniture and wall hanging.
When placing a piece of artwork on a wall with furniture, make sure there is enough distance between them so it won’t look too crowded. For above the sofa or bed– considering your artwork is around 2/3 the width of your sofa (like we discussed on tip #2) – have the bottom end of the piece lie around 15 to 20 cm above the sofa or headboard. For above the fireplace, hang art around 10 to 30 cm above the mantle. Again, when working with a group of wall hangings, treat them as one piece.
8. Maintain proper spacing between art pieces.
When choosing hanging more than one piece of wall décor, think of grouping them as a single unit rather than scattering them all over the room. Once you have grouped them, observe proper spacing. When dealing with a large space or a high wall, a group of art pieces can be spaced around 4 to 6 inches apart. In small spaces, like in a stair landing, hang the pieces in a tightly grouped manner, with 1 to 2 inches of space between one another.
Hanging pieces horizontally would be perfect for a hallway or a wall above the sofa. An odd number of pieces say 3 or 5, looks more pleasing to the eyes rather than a group of even number of pieces. 4 to 6 inches of spacing is recommended for this setting. You may use your hand, with fingers closed, to measure the spacing between the wall hangings.
Staircase walls are another great areas to decorate. If you’re using matching frames, follow the average-eye-level approach, but measure up from every third step to form a diagonal line.


